bugly的tinker热修复使用

前言

bugly 热修复使用的是微信的tinker,然后封装好了,不需要在进行后台开发,简化了步骤,简单几部就可以集成了。
热修复:在用户不知情的情况升级补丁,修复bug~~~ 告别重新下载安装App
微信提供的tinker,没得说上亿的用户摆在那

Android Studio IDE环境设置
tinker不支持instant run模式,你需要找到File->Settings->Build,Execution,Deployment->instant run并关闭,日常调试可以tinker关闭来使用instant run。

相关资源
bugly 热修复及官方方文档

1
https://bugly.qq.com/docs/user-guide/instruction-manual-android-hotfix/?v=20180119105842

tinker 源码

1
https://github.com/Tencent/tinker
下面是集成及使用的详细过程

####一、 Bugly 热修复集成
1.根目录gradle配置

1
2
// 只需配置tinker-support插件依赖,无需再依赖tinker插件
classpath "com.tencent.bugly:tinker-support:1.1.1"

2.在app module的“build.gradle”文件中添加依赖库

1
2
3
compile 'com.android.support:multidex:1.0.1'
compile 'com.tencent.bugly:crashreport_upgrade:1.3.4'
compile 'com.tencent.bugly:nativecrashreport:latest.release'
1
2
// 依赖插件脚本
apply from: 'tinker-support.gradle'

3.tinker-support.gradle文件上代码,多渠道的

1
2
3
4
5
6
7
8
9
10
11
12
13
14
15
16
17
18
19
20
21
22
23
24
25
26
27
28
29
30
31
32
33
34
35
36
37
38
39
40
41
42
43
44
45
46
47
48
49
50
51
52
53
54
55
56
57
58
59
60
61
62
63
64
65
66
67
68
69
70
71
72
73
74
75
76
77
78
79
80
81
82
83
84
85
86
87
88
89
90
91
92
93
94
95
96
97
apply plugin: 'com.tencent.bugly.tinker-support'

def bakPath = file("${buildDir}/bakApk/")

/**
* 此处填写每次构建生成的基准包目录
* todo 1.修改基准包目录 每次线上发布后,把这个目录保存下来,以后打补丁包需要
* bugly 官方文档:https://bugly.qq.com/docs/user-guide/faq-android-hotfix/?v=20180119105842
*/
def baseApkDir = "xqc_v3-0125-15-23-57"
/**
* 对于插件各参数的详细解析请参考
*/
tinkerSupport {
// 开启tinker-support插件,默认值true
enable = true
// 自动生成tinkerId, 你无须关注tinkerId,默认为false
// autoGenerateTinkerId = true
tinkerEnable = true
// 指定归档目录,默认值当前module的子目录tinker
autoBackupApkDir = "${bakPath}"

// 是否启用覆盖tinkerPatch配置功能,默认值false
// 开启后tinkerPatch配置不生效,即无需添加tinkerPatch
overrideTinkerPatchConfiguration = true

// 编译补丁包时,必需指定基线版本的apk,默认值为空
// 如果为空,则表示不是进行补丁包的编译
//当是多渠道打包,地址自动配的,下面三个配置无效
// @{link tinkerPatch.oldApk }
baseApk = "${bakPath}/${baseApkDir}/app-release.apk"
// baseApk = "${bakPath}/${baseApkDir}/app-debug.apk"

// 对应tinker插件applyMapping
baseApkProguardMapping = "${bakPath}/${baseApkDir}/app-release-mapping.txt"
// baseApkProguardMapping = "${bakPath}/${baseApkDir}/app-debug-mapping.txt"

// 对应tinker插件applyResourceMapping
baseApkResourceMapping = "${bakPath}/${baseApkDir}/app-release-R.txt"
// baseApkResourceMapping = "${bakPath}/${baseApkDir}/app-debug-R.txt"

//基准包tinkerId 和补丁包二选一
//todo 2.打补丁包的时候base改成patch 版本号改成对应基准包的
//平常的打包这里不用该保持base就好了
tinkerId = "base-${version_name}"

//多渠道打包设置这个的时候baseApk 将无效
buildAllFlavorsDir = "${bakPath}/${baseApkDir}"

// 是否使用加固模式,默认为false
// isProtectedApp = true

// 是否采用反射Application的方式集成,无须改造Application
enableProxyApplication = true

// 支持新增Activity
supportHotplugComponent = true

}

/**
* 一般来说,我们无需对下面的参数做任何的修改
* 对于各参数的详细介绍请参考:
* https://github.com/Tencent/tinker/wiki/Tinker-%E6%8E%A5%E5%85%A5%E6%8C%87%E5%8D%97
*/
tinkerPatch {
//oldApk ="${bakPath}/${appName}/app-release.apk"
ignoreWarning = false
useSign = true
dex {
dexMode = "jar"
pattern = ["classes*.dex"]
loader = []
}
lib {
pattern = ["lib/*/*.so"]
}

res {
pattern = ["res/*", "r/*", "assets/*", "resources.arsc", "AndroidManifest.xml"]
ignoreChange = []
largeModSize = 100
}

packageConfig {
}
sevenZip {
zipArtifact = "com.tencent.mm:SevenZip:1.1.10"
// path = "/usr/local/bin/7za"
}
buildConfig {
keepDexApply = false
//tinkerId = "1.0.1-base"
//applyMapping = "${bakPath}/${appName}/app-release-mapping.txt" // 可选,设置mapping文件,建议保持旧apk的proguard混淆方式
//applyResourceMapping = "${bakPath}/${appName}/app-release-R.txt" // 可选,设置R.txt文件,通过旧apk文件保持ResId的分配
}
}

二、初始化sdk,这里使用不改造Application的方式,直接在application中初始化

1
2
3
4
5
6
7
8
9
10
11
12
13
14
15
16
17
18
19
20
21
22
23
24
25
@Override
public void onCreate() {
super.onCreate();
// 设置是否开启热更新能力,默认为true
Beta.enableHotfix = true;
// 设置是否自动下载补丁
Beta.canAutoDownloadPatch = true;
// 设置是否提示用户重启
Beta.canNotifyUserRestart = true;
// 设置是否自动合成补丁
Beta.canAutoPatch = true;
// 这里实现SDK初始化,appId替换成你的在Bugly平台申请的appId
Bugly.init(this, "appid", false);
}

@Override
protected void attachBaseContext(Context base) {
super.attachBaseContext(base);
// you must install multiDex whatever tinker is installed!
MultiDex.install(base);


// 安装tinker
Beta.installTinker();
}

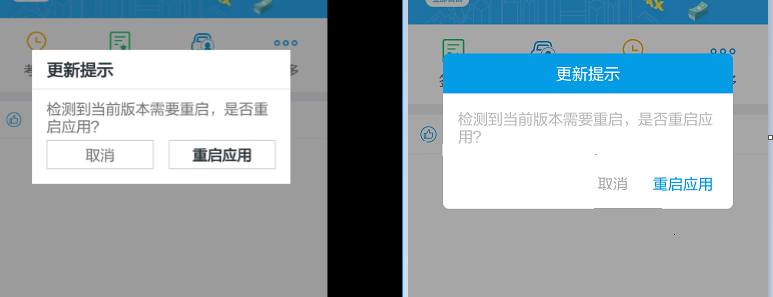
三、自定义重启合并补丁提示界面

bugly 热修复提供自定ui布局方式
https://bugly.qq.com/docs/user-guide/advance-features-android-beta/?v=20170912151050
修改重启提示

1
Beta.tipsDialogLayoutId = R.layout.dialog_tinker_tips;

dialog_tinker_tips是自定义对话框

注意:因为要保持接口统一,需要用户在指定控件按照以下方式设置tag,否则会影响您的正常使用:
标题:beta_title,如:android:tag=”beta_title”
提示信息:beta_tip_message 如: android:tag=”beta_tip_message”
取消按钮:beta_cancel_button 如:android:tag=”beta_cancel_button”
确定按钮:beta_confirm_button 如:android:tag=”beta_confirm_button”

1
2
3
4
5
6
7
8
9
10
11
12
13
14
15
16
17
18
19
20
21
22
23
24
25
26
27
28
29
30
31
32
33
34
35
36
37
38
39
40
41
42
43
44
45
46
47
48
49
50
51
52
53
54
55
56
57
58
59
60
61
62
63
64
65
66
67
68
69
70
71
72
73
74
75
76
77
<?xml version="1.0" encoding="utf-8"?>
<RelativeLayout xmlns:android="http://schemas.android.com/apk/res/android"
android:layout_width="match_parent"
android:layout_height="match_parent"
android:background="#59000000">

<LinearLayout
android:layout_width="match_parent"
android:layout_height="wrap_content"
android:layout_centerInParent="true"
android:layout_centerVertical="true"
android:layout_marginLeft="35dip"
android:layout_marginRight="35dip"
android:orientation="vertical">

<TextView
android:id="@+id/tv_dialog_title"
android:layout_width="match_parent"
android:layout_height="@dimen/item_height_40"
android:background="@drawable/dialog_confirm_top_bg"
android:gravity="center"
android:tag="beta_title"
android:text="@string/dialog_confrim_title"
android:textColor="@color/white"
android:textSize="@dimen/common_text_size_16" />

<LinearLayout
android:layout_width="wrap_content"
android:layout_height="wrap_content"
android:background="@drawable/dialog_confirm_bottom_bg"
android:orientation="vertical"
android:paddingBottom="@dimen/margin_10">

<TextView
android:id="@+id/tv_dialog_content"
android:layout_width="match_parent"
android:layout_height="wrap_content"
android:minHeight="@dimen/item_height_75"
android:padding="@dimen/margin_15"
android:tag="beta_tip_message"
android:text="@string/dialog_confirm_content"
android:textSize="@dimen/common_text_size_15" />

<RelativeLayout
android:layout_width="match_parent"
android:layout_height="wrap_content">

<TextView
android:id="@+id/tv_dialog_positive"
android:layout_width="wrap_content"
android:layout_height="wrap_content"
android:layout_alignParentEnd="true"
android:layout_alignParentRight="true"
android:layout_alignParentTop="true"
android:layout_marginEnd="15dp"
android:layout_marginRight="15dp"
android:padding="@dimen/margin_5"
android:tag="beta_confirm_button"
android:text="@string/dialog_confirm_positive"
android:textColor="@color/c_049ce5"
android:textSize="@dimen/common_text_size_15" />

<TextView
android:id="@+id/tv_dialog_negative"
android:layout_width="wrap_content"
android:layout_height="wrap_content"
android:layout_marginRight="@dimen/margin_15"
android:layout_toLeftOf="@id/tv_dialog_positive"
android:padding="@dimen/margin_5"
android:tag="beta_cancel_button"
android:text="@string/dialog_confirm_negative"
android:textColor="@color/c_aeaeae"
android:textSize="@dimen/common_text_size_15" />
</RelativeLayout>
</LinearLayout>
</LinearLayout>
</RelativeLayout>

Alt text

四、使用刚刚集成的bugyly热修复打包及打补丁包

1.打debug包

调试不需要在该任何配置。

2.打release包

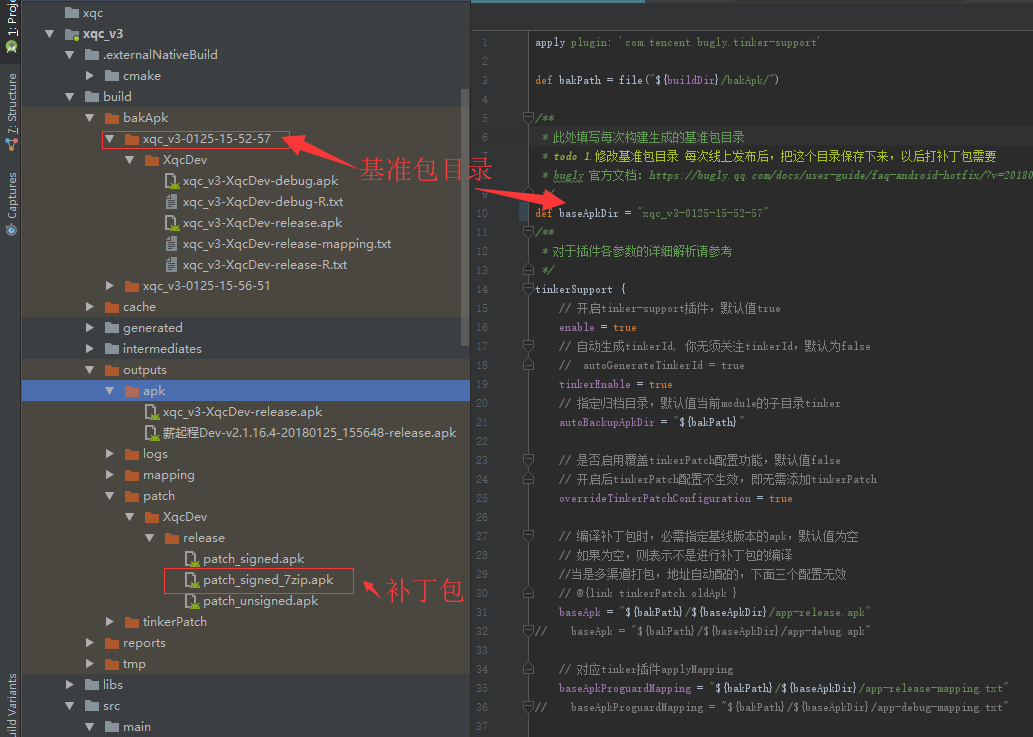
需要把app/build/bakApk下面对应的备份的文件夹保存起来,这个就是基准包目录,用来以后以这些文件为基准包打补丁包。
Alt text

#####3. 打补丁包
1.找到之前打release包时候,保存下来的文件夹,放在app/build/bakApk下面

2.修改配置
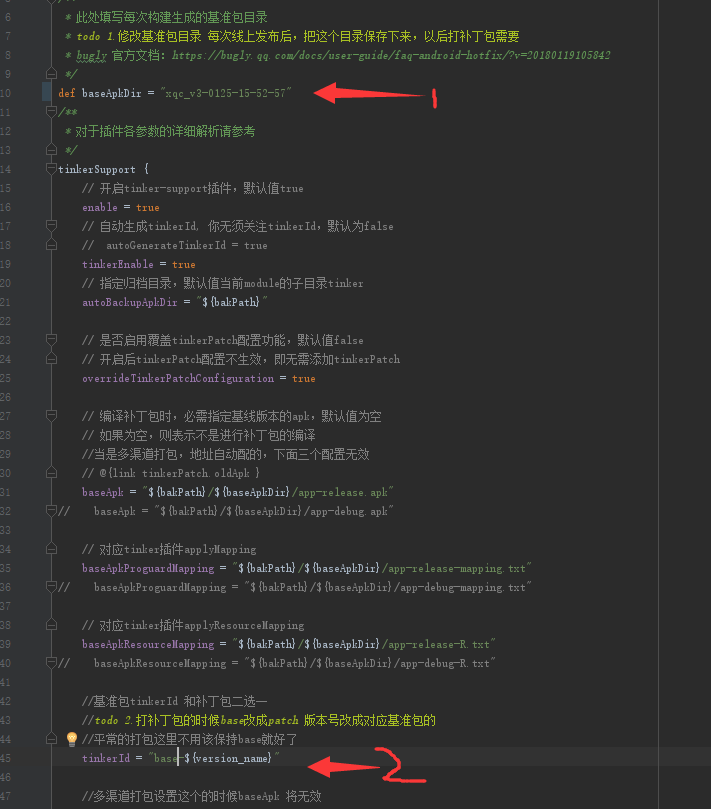
修改tinker-support.gradlebaseApkDir等于基准包目录(刚刚放在bakApk下的某个文件夹)

修改tinkerId = "base-${version_name}"base改成patch${version_name}改成对应基准包的版本号
Alt text

3.点击右上角gradle点开Tasks,找到tinker-suport就是打补丁的,比如点击buildTInkerPatchXqcDevRelease就是打开发环境release的补丁包,
Alt text

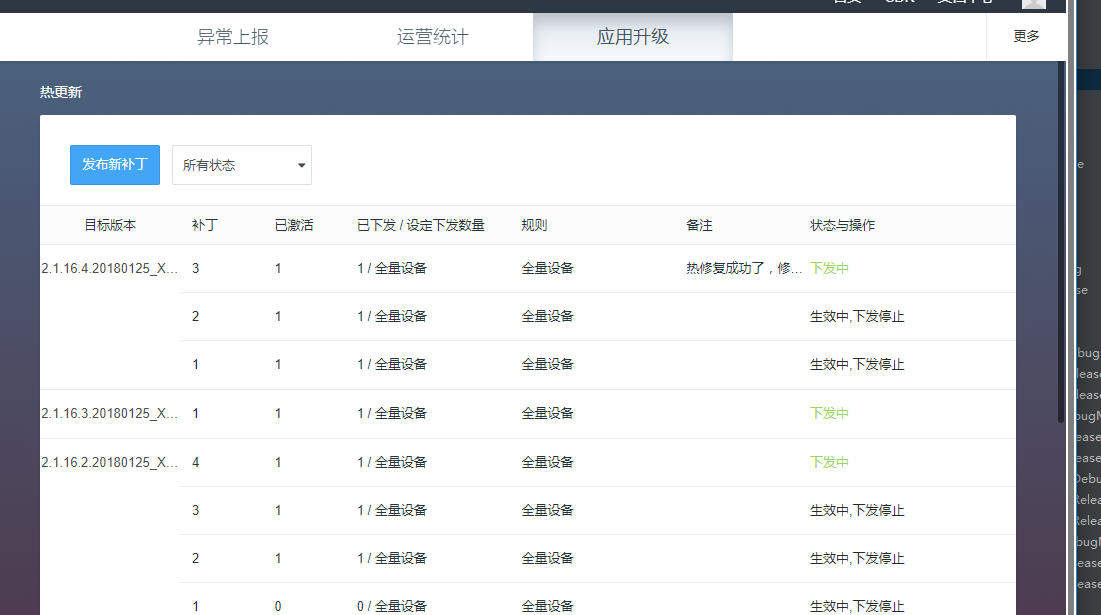
4.登陆bugly后台-应用升级-发布补丁,上传app/build/outputs/patch目录下的patch_signed_7zip.apk补丁包并上传,

发布补丁之前,必须需要有人运行过了之前的基准包apk,否则会上传不了补丁包
Alt text

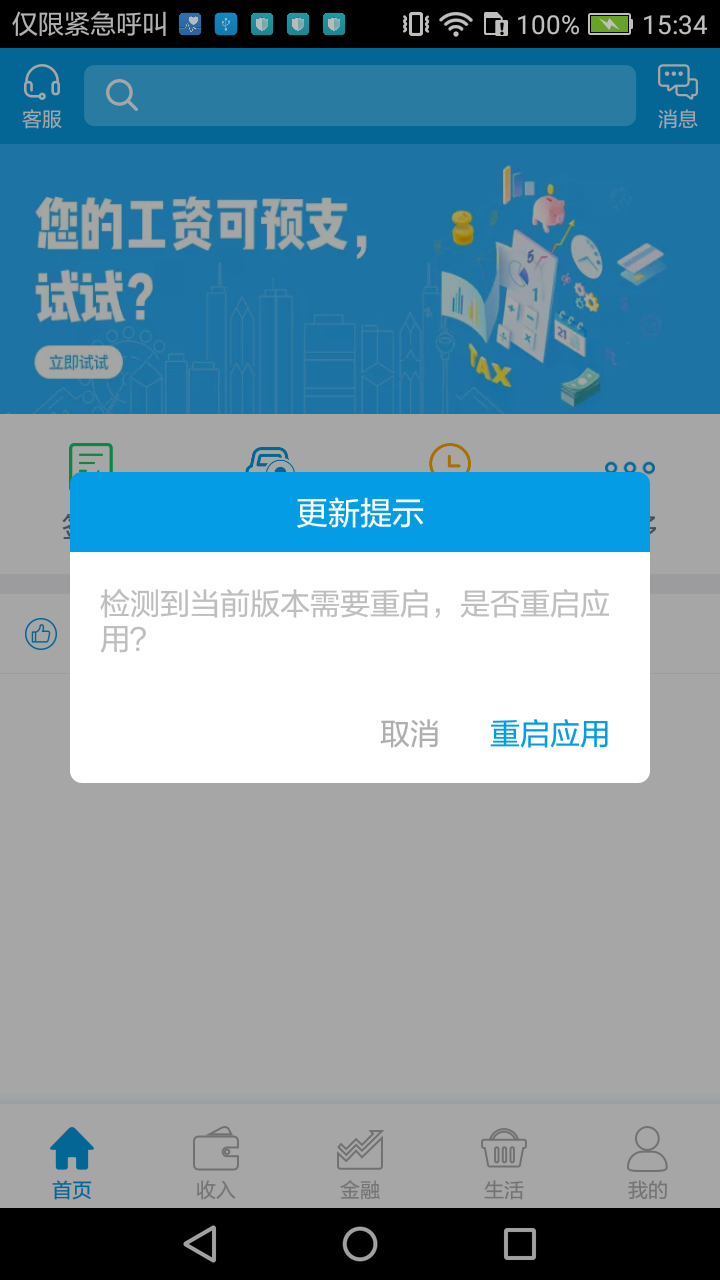
5.客户端每次启动会检测,并且合并补丁
Alt text

注意:用户更新补丁包需要重启两次,一次获取补丁包,一次合并补丁重启生效

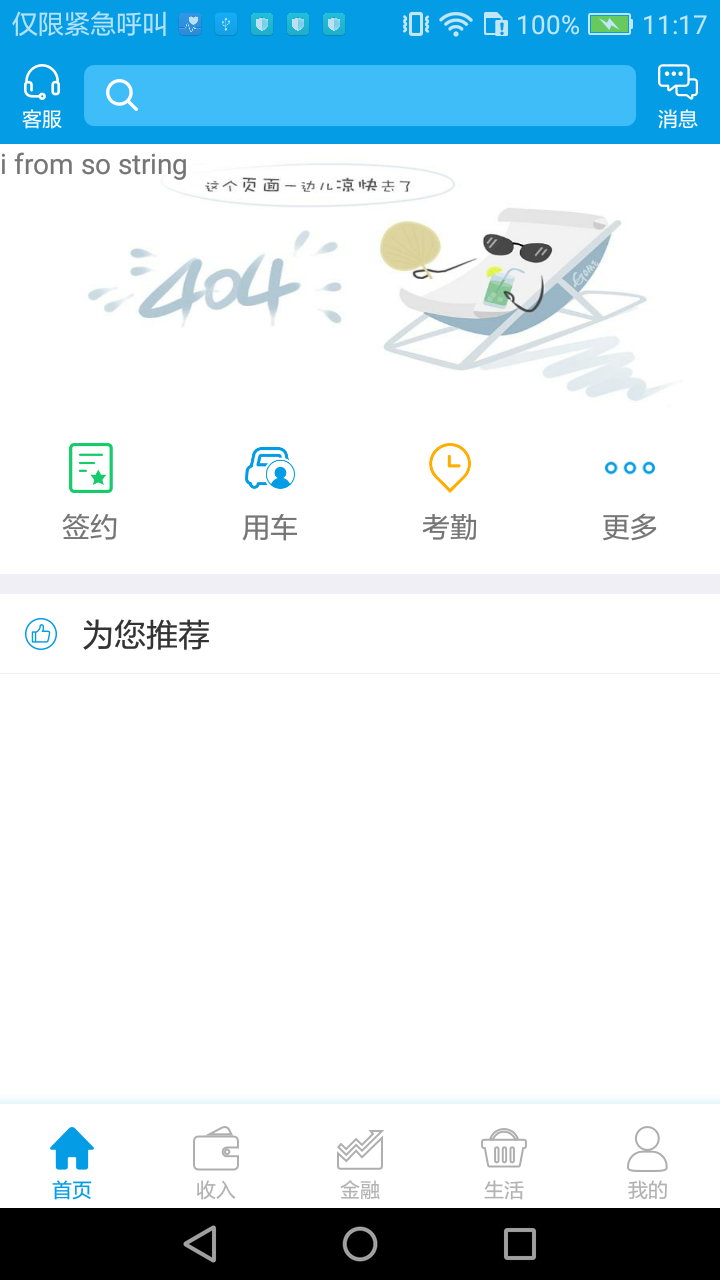
经测试补丁包可以合并类,资源,so库
补丁包是 加了新图片,并替换,修改资源文件,修改了类,加了个新的so动态库,并调用动态库native方法,重启之后如下
Alt text